Here's what I came up with:

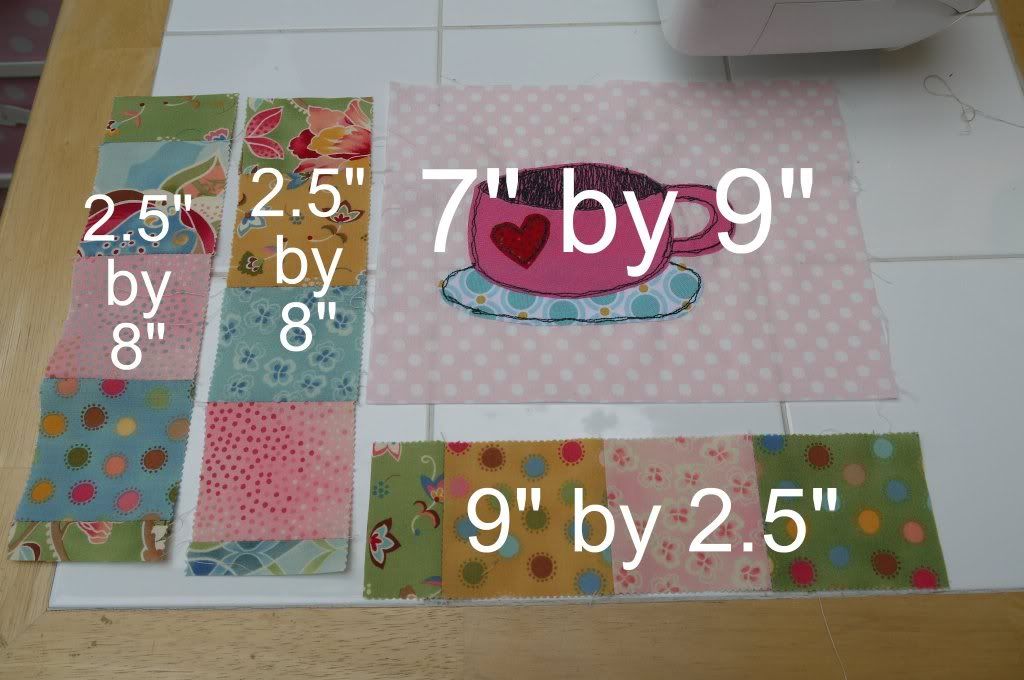
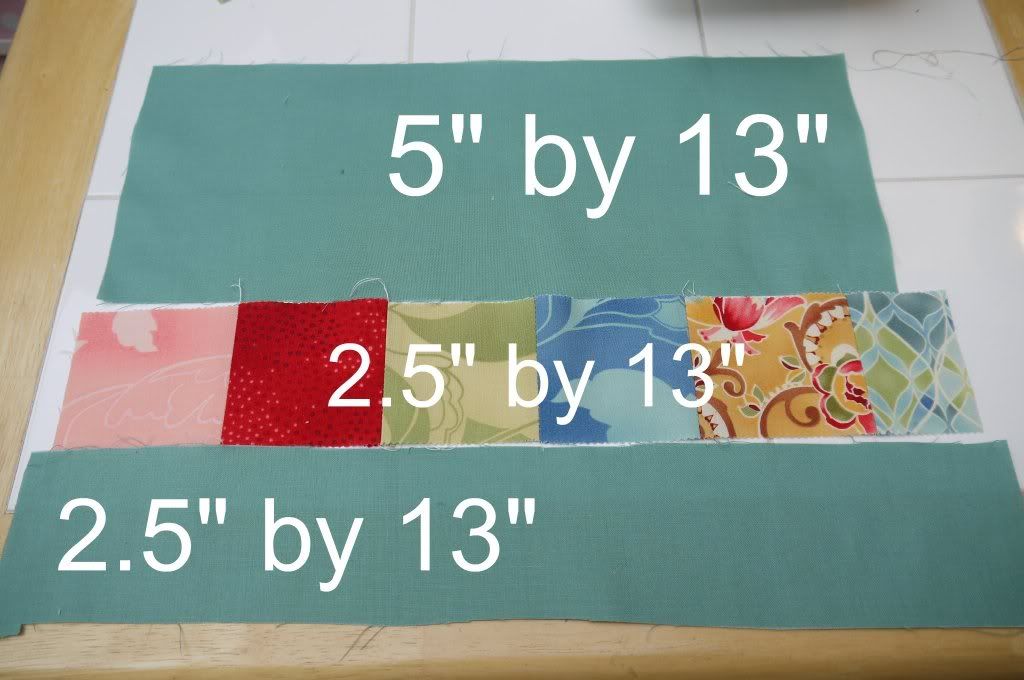
First, for the front, you'll need 3 strips, 2 for the side and 1 for the bottom. And you'll need a piece of fabric measuring 7" by 9". See pic below:
For the coffee mug, I used the template I made, using Bond a Web Lite. I cut the pieces, then played with the placement of them all.
You'll notice on the template that there's a dotted line on the top of the mug - that's where we're going to put our 'coffee'.
Once you're happy with the layout, you can start stitching it down. If you are super nervous about your freehand skills, you can use thread which matches your fabric pieces, as little 'mess-ups' won't be as obvious. Me, I like to live dangerously (and it's all practice, right?), so I went straight for dark brown:


And made the back, too:


If you make one, I'd love for you to email me with a picture:
Or you can post it to the flickr group! And if you make one for the mug rug swap, here's the special flickr group for that!
Hope this was useful!

Copyright Notice:
© J C Excell, 2011 You are welcome to use any SewHappyGeek tutorial for personal use. You are even welcome to make a couple to sell, but you are not given permission to use my pictures or my words without giving me credit and linking back to the original. Sometimes my pictures have my family in them and they are never intended for public use. Also, I work very hard to provide free tutorials for my lovely readers, and anyone copying or selling my tutorials is guilty of copyright infringement.
Adorable. You did a great job! Thanks for sharing Jenna!
ReplyDeleteVery cute! I love how you used free motion stitching on the mug.
ReplyDeleteThis is so darn cute! Great job!
ReplyDeleteThanks so much for linking up at Craft and tell Tuesdays! Awesome job : )(
ReplyDeleteThat is so cute, I love the little heart on the mug, thanks for sharing how you made it!
ReplyDeleteThis mug rug is really cute Jenna, will make this. I made a couple mug rugs last month----but not so cute, but like the process.
ReplyDeleteSeriously AWESOME!!! Love it! Thanks for sharing this!
ReplyDeleteSO cute! And I love that little pink mug...it's darling!
ReplyDeleteI am adding this to my to make list along with the butterfly tut! Thanks.
ReplyDeleteThis is adorable, and, as a coffee addict, made me smile. Thanks for sharing!
ReplyDeleteI just love it! I have no idea if my sewing machine does that free motion setting. Is that standard? Time to break out my manual!
ReplyDeleteLove this! I hope to be able to make one from my mom for Mother's Day. Thanks for sharing the tute! (found you on the Whimsy Couture link up!)
ReplyDeleteThank you for the pdf! I was actually thinking about making some mug rugs with mugs on them as Mother's Day gifts for the mothers in my life but then I couldn't get the mugs to look the way I wanted. Thanks for making my life easier! :-)
ReplyDeleteThank you !! cheers from Italy !!
ReplyDeleteIt's SO darling. Love the pattern. Thanks for linking to Quiltstory!
ReplyDeletelovely,I want i!!thanks for sharing jenna!!
ReplyDeletehugs from spain
So cute! I love it! I love the bright colors too!
ReplyDeleteThis is just great! Thank you so much for sharing such an awesome project!
ReplyDeleteSo totally cute! I love your use of free motion too--only found out about that recently but have been uninspired as to how to use it, so thanks for the inspiration! :D
ReplyDelete